Widgets: Advanced Forms
The Advanced Forms widget allows you to build custom forms that drive both engagement and
conversion, and integrate seamlessly with your site design. For example, you can create a form to
collect information about potential customers, gather customer feedback, or offer account and event
registration.
Following are some benefits to using the Advanced Forms widget:
- Design flexibility. Add widgets and inner columns to truly customize the form design.
- Custom messages. Write custom success and error messages that are tailored to your business.
- Submission settings. Define who receives a copy of form submissions and configure where visitors
are redirected after the form is submitted. - Submission tracking. Easily view form responses both in the editor and from the site dashboard.
Limitations
While the Advanced Forms widget is in testing, there are several limitations:
- Fields and the submit button must stay inside the form container.
- The submit button cannot be deleted or duplicated.
Create Advanced Form
By default, the Advanced Form widget has a predesigned template that includes error and success
messages. You can customize the form to meet your business needs by adding or removing input
fields, inner columns and widgets.
To create an Advanced Form:
- In the side panel, click Add, then click Widgets.
- Search for Advanced Form, then drag and drop it onto the canvas.
- Add inner columns and widgets as needed by dragging them from the widget panel into your form.
- Add input fields to the form by dragging and dropping them from the Form section of the widget
panel. The input field options are: short text, long text, checkbox, radio button, dropdown, phone
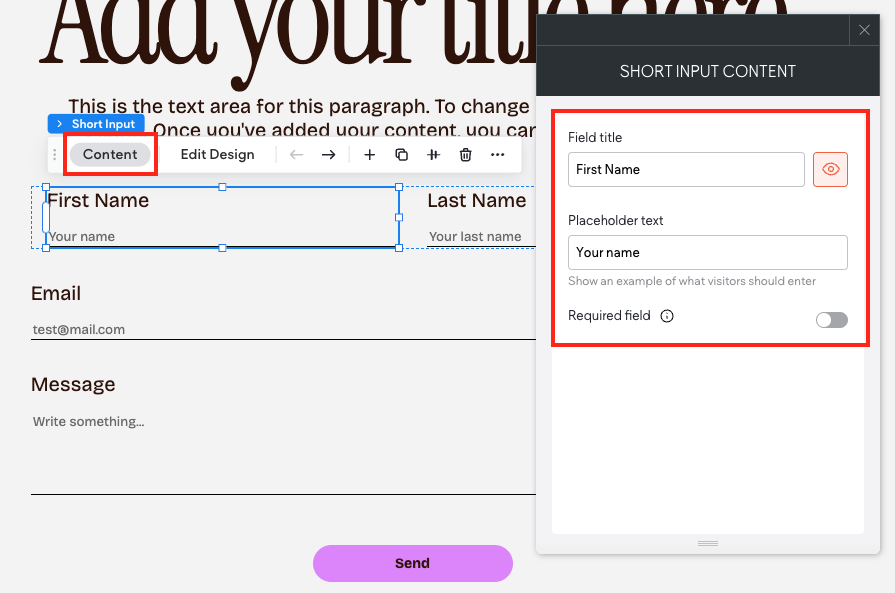
number, date, time, number, and email. - To configure an input field, click the field widget to open the floating bar and click Content. As
applicable, configure the field title, placeholder text, options, and whether the field is required to
submit the form. Repeat for each field you added to the form.
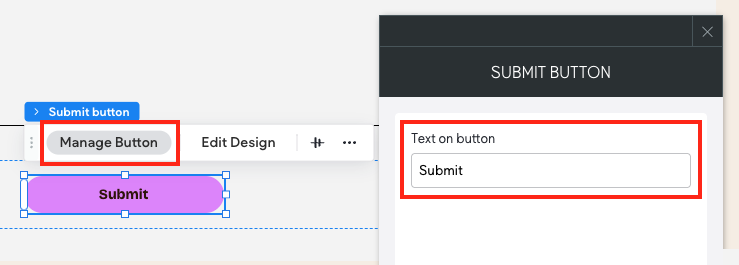
- Click the Submit Button widget to open the floating bar. Click Manage Button and enter the text
you want displayed on the button.
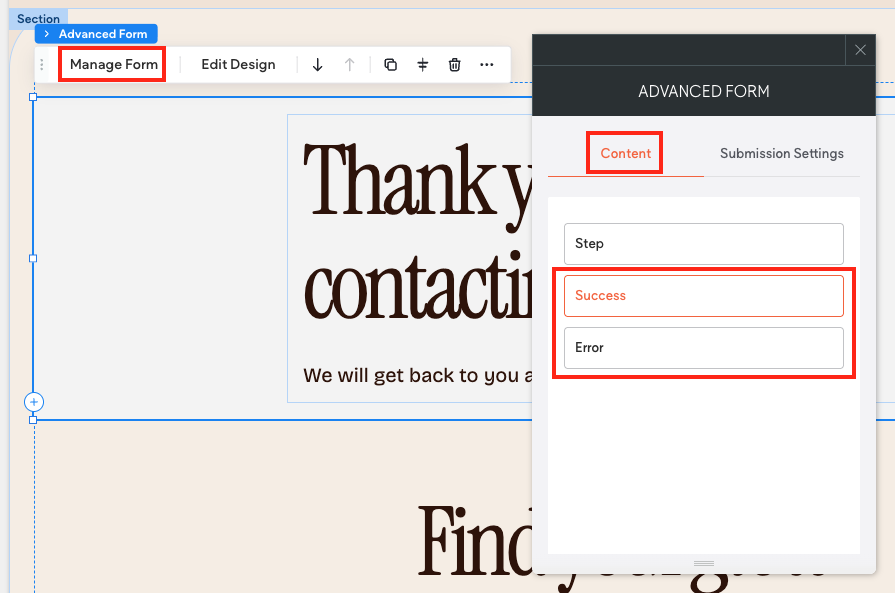
- Click the Advanced Form widget to open the floating bar, and click Manage Form. On the Manage
Steps tab of the context menu, you can access the success and error message screens by clicking
Success or Error. Configure these screens by updating the default text, and adding inner columns
and widgets as desired.
Configure Form Submission Settings
In the form’s submission settings you add a form name, configure emails sent to the site owner and site
visitor who submitted the form, and optionally redirect site visitors to a specific page or external website
after submitting the form.
To configure form submission settings:
-
Click the Advanced Forms widget to open the floating bar, then click Manage Form to open the
context menu. -
On the Submission Settings tab of the context menu, configure the following:
- Form name. Type a name for the form. This name is only visible internally. We recommend
giving each form a different name so it is easy to distinguish between forms when viewing form
responses. - Sent from. Type a name. By default, this field shows your business name or site domain.
- Email subject line. Type a subject line.
- Notify by email to. Enter an email address in this field. If entering multiple emails, separate with
a space or click the enter key. - (Optional) Check the Use content library email checkbox to have the form submissions sent
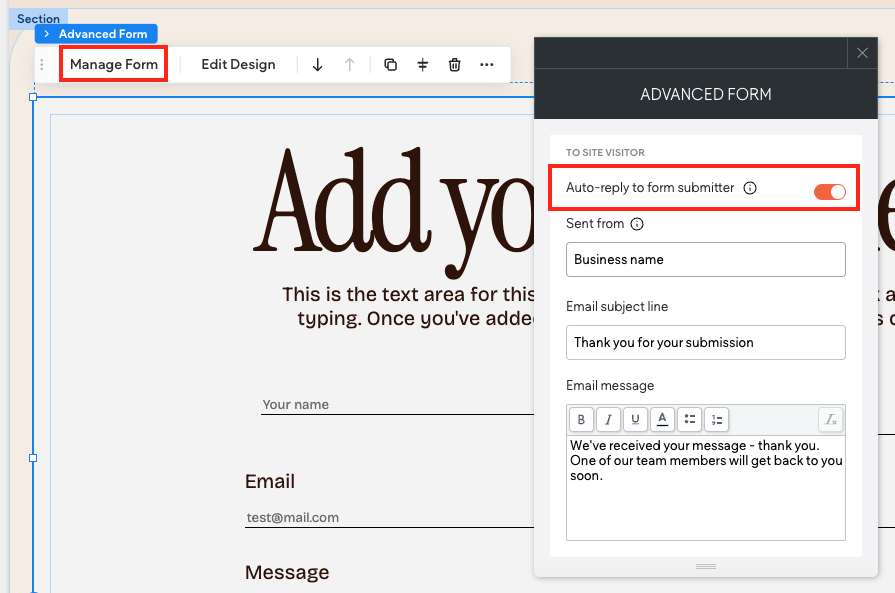
to the email listed in the content library. - (Optional) Enable the Auto-reply to form submitter toggle if you want site visitors to receive an
email copy of their responses. The email is sent as soon as the site visitor submits the form. If
enabled, you will need to configure the Sent from, Email subject line, and Email message fields. - (Optional) In the After Submission Settings section, click Redirect to a page after submission
to select the existing site page or external URL that site visitors are directed to after submitting. If
enabled, it skips the success message.
- Form name. Type a name for the form. This name is only visible internally. We recommend
Advanced Form Design
The Advanced Form is unique because you can add inner columns and widgets, and then style each
element independently. For input fields, you can modify the alignment, spacing, size, and animation
from the design panel.
By default, Theme styles are applied to the Advanced Form elements, but can be overridden by any
selections you make in the design panel for a particular element.
To learn about the various design options in the design panel, see Design with Flex.
View Form Responses
You can view Advanced Form responses in the editor or in the site dashboard, however form responses
can only be downloaded from the site dashboard.
Editor
To view form responses in the editor, click SEO & Settings in the side panel, then click Manage Form
Responses.
Site Dashboard
To view responses in the site dashboard, navigate to your site list, then click the site dashboard icon
next to the desired site. In the Site Overview section, click Form Responses. If you need to download
form responses, click Export to CSV.
Advanced Forms FAQs
What is the difference between the Contact Form widget and the Advanced
Forms widget?
The Advanced Form widget offers greater design flexibility and customization options, while the Contact
Form widget offers more basic design and less customization options.
Following is a comparison of larger features:

How do I edit the success or error message for my form?
To edit form messages:
- Click the Advanced Form widget to open the floating bar, then click Manage Form.
- Click the Content tab, then click either Success or Error. On the canvas, the widget now displays the default text for either the success or error message instead of the form’s steps or fields.
- Click the text widget that contains the error or success message and edit the text and design as desired. You can add additional widgets or inner columns in this view as well.

Can I send an email to the site visitor after they submit the form with a copy
Yes, you can enable this setting in the Submission settings tab in the Advanced Form widget’s context menu.
To send site visitors a copy of their form responses:
- Click the Advanced form widget to open the floating bar, then click Manage Form.
- On the Submission Settings tab, scroll down and expand the Email Settings section.
- Enable the toggle next to Auto-reply to form submitter. You will need to configure the Sent from, Email subject line, and Email message fields.
Can I have an email sent to my account when a visitor submits a form?
Yes. To receive an email when the form is submitted, you need to add the email address of the desired recipient in the content panel of the form.
To send an email when a visitor submits a form:
- Click the Advanced form widget to open the floating bar, then click Manage Form.
- On the Submission Settings tab, scroll down and expand the Email Settings section.
- Enter an email in the Notify by email to: field. If entering multiple emails, separate with a space or click the enter key. Or, check the Use content library email box to have the form submissions sent to the email listed in the content library.

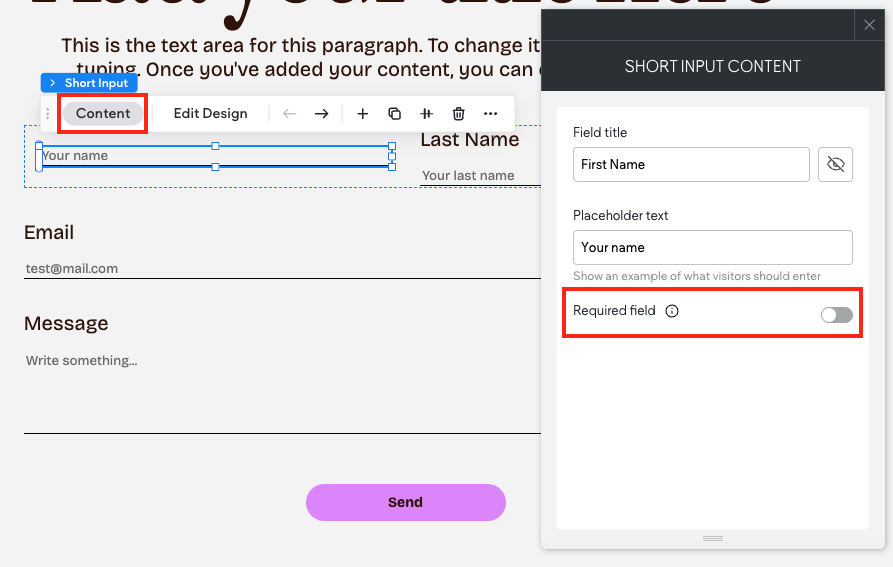
How do I make a step or field in my Advanced Form required?
To make a step or field in your Advanced Form required:
- Click the desired field to open the floating bar, then click Content.
- Enable the Required field toggle.
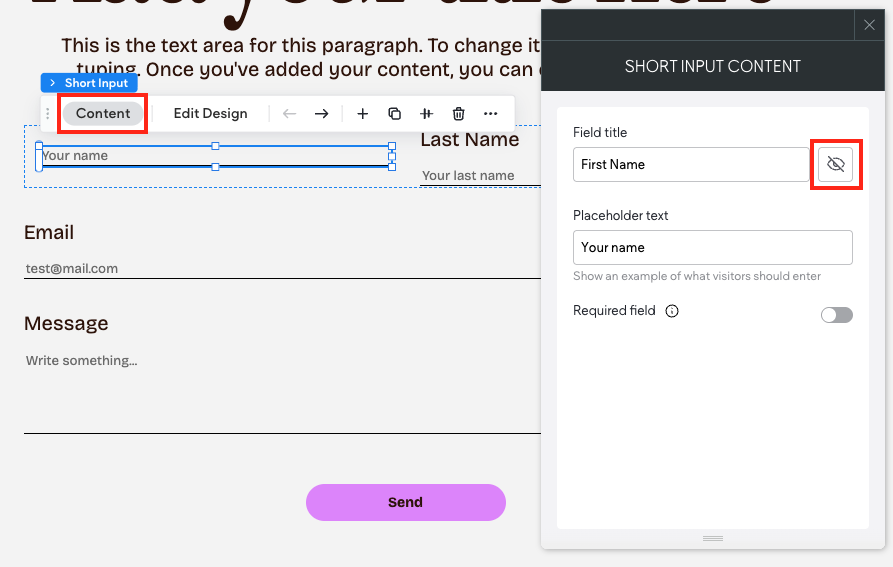
How do I hide a field title for my Advanced Form?
To hide a field title:
- Click the desired field to open the floating bar, then click Content.
- Click the eye icon next to the field title. The eye will become crossed out when the field title is hidden
Updated 3 months ago