Pages & Single Page Management
Pages
Pages allows you to reorder, manage and create new pages in your site. Organize your site's content
by using multiple pages to improve your visitors' experience and increases the chance that they will find
the information they need.
You can create a maximum of 1000 site pages and 1500 blog pages.
NOTE
URL parameters are not supported.
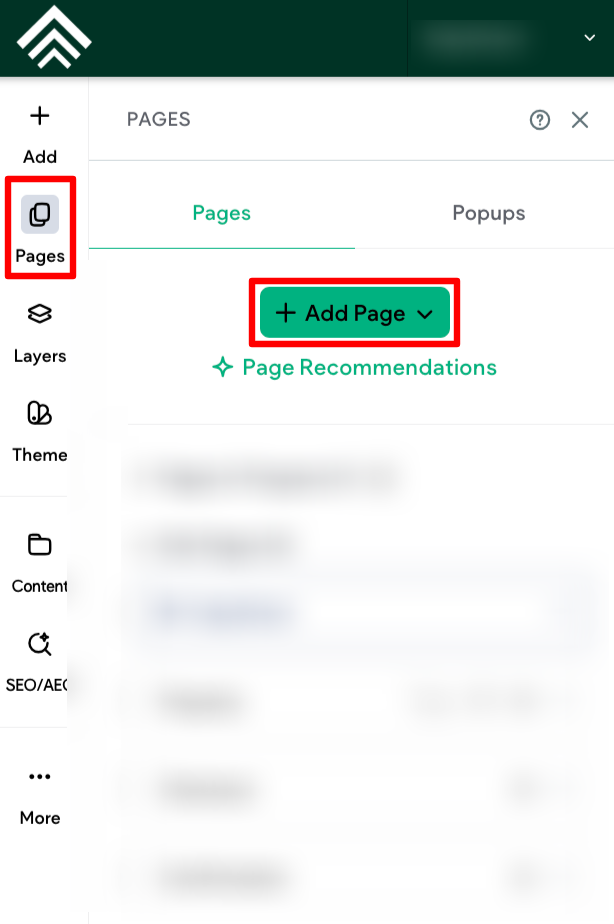
Add Pages
To add new pages to your site:
- In the side panel, click Pages.
- Click + Add Page.
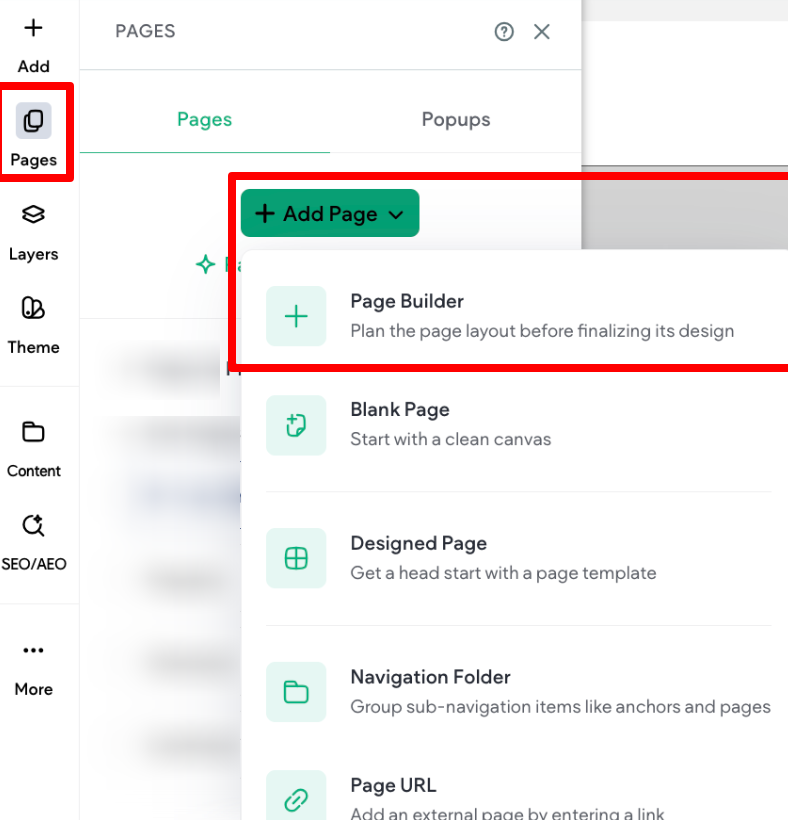
- Select a page type. Page templates are pre-populated with relevant widgets. The Page URL page
type links the page to another URL instead of creating a new page. - Type a title for your new page, and a URL, if necessary.
- Click + Add Page and start creating your new page.
Page Builder
The page builder allows you to plan the layout before finalizing the page’s design.
To use the page builder:
-
In the side panel, click Pages.
-
Click +Add Page.
-
Select Page Builder. This opens Page Mode.
-
In the side panel, a list of sections and types are displayed. Click the desired section to add it to
your page. -
You can click +Add section to add up to 50 sections. Or you can click Generate Page Layout to
use AI to generate a layout for you. If you have not already filled out the business profile, you will
be prompted to. -
(Optional) If you do not like the AI generated page layout, click the arrow on the Generate Page
Layout button and select Suggest a Different Layout or Edit Page Prompt. -
In the floating menu, use the up and down arrows to reorder sections or click the trash can icon to
delete a section. -
To replace a section, click to select the section, then select a new section from the side panel.
-
(Optional) If you need to duplicate or rename the page, click the three horizontal dot icon next to
the page name and select Rename Page or Duplicate Page. -
(Optional) If you used AI to generate the page layout, you can click Add Content with AI to
generate text and images for the page. After reviewing the prompts for each section and editing
as necessary, click Looks Good. Generate. If you are not satisfied with the text or images, click
the arrow on the Regenerate Page Content button and select Edit Section Prompt, Regenerate
Image Only, or Regenerate Text & Images.You cannot use this feature with custom sections.
-
When you are done editing, click Save for Later or Add Page to Site. If you click Save for
Later, the page will be saved in the Pages menu under Pages in Progress.
If you need to delete the entire page, click the trash can icon in the top bar. This cannot be undone.
Reorganize Pages
To reorganize the order pages display on your site:
- In the side panel, click Pages.
- Click and drag a page to move it where you want it to appear in order.
- (Optional) Drag a page slightly to the right to nests the page as a sub-page of the page above.
Navigation can have up to three levels.
Delete Pages
To delete a page:
- In the side panel, click Pages.
- Click the gear icon next to the desired page.
- Select Delete.
Single Page Management
There are several actions you can take on a single page.
Publish Single Page
You can update the content of a page that is already published without republishing the whole site and
without updating the content of other pages. This feature does not allow you to create a new page and
publish only that page.
NOTE
- Theme changes (for example, changes to header, footer, or site theme) will not be
applied when a single page is published.- Each language on a multi-language site will need to be updated separately.
- An automatic backup is created each time a single page is published.
- To apply page URL changes, you must publish the entire site.
To publish a single page:
- In the side panel, click Pages.
- Click the settings icon next to page you want to publish.
- Click Publish page. A calendar icon displays on the page to indicate it has been published
separately from the entire site.
Set Single Page as Draft
Set a page as a draft when you do not want it to be searchable or on the live site. Once the site is
published or republished it will not exist on the live site.
NOTE
- The home page, external-link pages, and folders cannot be drafted.
- If a main navigation item with sub-pages is Set as a draft, the sub-pages will no
longer be accessible in the navigation.- For multi-language sites, when drafting a page in the default language, the page will
be drafted in the additional languages as well. Pages in the additional languages can
be drafted without depending on the default language’s status.- For multi-language sites, the same page cannot be added to the next publish until
the page in the default language is added to the next publish as well.
To set a page as a draft:
- In the side panel, click Pages.
- Click the settings icon for the specific page.
- Click Set as a draft. If the page is in the navigation, it will be removed.
- Click Republish to remove the page from the live site.
To remove a page from draft state:
- In the side panel, click Pages.
- Click the settings icon for the specific page.
- Click Stage draft for publish. It will be added back to the navigation.
- Click Republish to add the page to the live site.
Page Settings and SEO
Access page settings by clicking the settings icon next to each page. You have the following
options:
- Rename- Rename the page in the editor. This does not change the page URL.
- Hide in navigation - Make the page hidden on the navigation menu. It will still be visitable by the direct
URL. - Duplicate - Creates an exact copy of the page.
- Publish page - Publish changes on a single page. For more information
- Page URL - Customize the URL for the page.
- SEO - Access all the SEO settings for the page.
- Set Access - Set a password for the page or configure the page for members only. For more information, see Password Protected Pages section in this article .
- Convert to Dynamic Page. Click to convert the page to a dynamic page. Select a collection, and
click Done. - Set as a draft - Set a page as a draft when you do not want it to be searchable or on the live site. For
more information - Delete - This deletes the selected page.
Page SEO
Search engine optimization (SEO) is the process of improving the visibility of a site or a web page
in a search engine's un-paid search results. Sometimes this is called "natural" or "organic" traffic. We
recommend adding SEO information (title and descriptions) on the page level, so each page can have a
unique title and description. This is more beneficial than having one title and description shared across
the entire site.
On a page’s SEO screen, the following options are available:
- Set page to no index. Tell search engines not to crawl this page so it won’t appear in search results.
Draft pages are set to no index by default. See Prevent Search Engines from Indexing a Page section in this article. - Page meta title. This is the text that appears on SERP results, browser tabs and when sharing this
page on social media. Use AI to assist in generating the title. - Page meta description. The meta description appears in SERP results. Use AI to assist in generating
the description. - Page keyword. Search engines no longer take entered keywords into consideration when ranking
websites, so these are optional.
You can also edit the header HTML for that page only. However, it is important to note that consent
management apps are not able to prevent code from running prior to consent when the code is placed
in the header HTML. This is because Website Builder optimizes the structure and order of how content
loads, based on performance best practices on the site. We place scripts and CMP banners lower on
the page, in order to improve the performance of primary content. Because of this, it is recommended to
place code in the body-end when using a consent management app.
Change Home Page
You can change the home page of your site, and set any other page in its place. The original home
page will be saved as a regular page and can be reinstated as the home page at any time.
This is very helpful when you want to set an "under construction page" while working on your site or
when you want to make changes to the homepage while keeping the old homepage in place.
NOTE
- Multilingual sites are not currently supported.
- This option is only available for normal pages (not popups, anchors, external pages,
dynamic pages, 404 page, blog posts, and so on).
To change the homepage:
- In the side panel, click Pages.
- Next to the page you want to set as your home page, click the settings icon, and select Set as
home page. - Provide a new alias (URL) for the existing home page.
- When setting a new homepage we do not change any links on your site, so any links pointing to the
old homepage will need to be changed to the new one. - (Optional) Delete the old homepage.
Prevent Search Engines from Indexing a Page
For maximum SEO benefits, all pages of your site are discoverable by search engines. However, if you
would like to instruct search engines to drop or not include this page in their index after they crawl the
page, you can do that in the page settings.
NOTE
Pages protected with membership access are not accessible to site crawlers. However,
if a user logs into a membership protected page and copies the CDN link to a file or
image, they will be able to share it.
To prevent search engines from indexing a page:
- In the side panel, click Pages.
- Click the settings icon for the specific page.
- Click SEO.
- Click the No Index toggle. This instructs search engines to drop or not include this page in their
index after they crawl the page. - Repeat steps 1-4 for each page you do not want to be indexed.
NOTE
- If this page was previously indexed, this change will take several weeks for search
engines to update and remove the page.- This setting adds the
<meta name="robots" content="noindex">tag into
the head of the page for search engines to read. /callout
Password Protect a Page
With password protected pages, you can add a password to specific pages on your site that visitors
will need to enter in order to view that page. Password protected pages are beneficial when certain
information is designed for specific audiences; for example, to restrict access to a download page.
Password protected pages should not be confused with user logins or account management. Password
protected pages only adds an individual password for one page, not different passwords for different
users.
NOTE
- Anchored pages cannot be password protected pages. In order to password protect
a page, make sure that the page is not anchored to another page.- Dynamic pages cannot be password protected pages.
To create password protected pages:
- In the side panel, click Pages.
- Click the settings icon for a specific page.
- Click Set Access.
- Click Password Protected, and type the password visitors will need to type to access the page.
The password can be no more than 100 characters, but can contain any characters. - Click Save. This page is now protected by a password. You can remove this password at anytime
by clicking Open to Everyone.
To log out of a password protected page, clear the cache for the site or browser. Even if the password
for the page is changed, users that are logged into a password protected page will stay logged in until
they clear their cache.
Updated 3 months ago