Automate guest access with Uplisting Smart Locks
Navigate and manage your linked locks effortlessly using the Uplisting Smart Locks dashboard.
What is the Smart Locks Dashboard?
Take your keyless entry to the next level with Uplisting Smart Locks Dashboard, which allows you to remotely manage access to your property through our dashboard and the connected smart locks, within Uplisting’s platform. Choose from a wide selection of Wi-Fi and Z-Wave smart locks from August, Yale, Schlage, Kwikset, and others, plus hardwired access control systems from Mercury, HID, and more.
Why activate Smart Locks?
Activating Smart Locks allows you take full control over automating the entire guest check-in process. Uplisting creates a unique door lock code for each guest reservation. The unique door code can be dynamically inserted into your automated guest messages using the {lock_code} message tag.
How does a smart lock work?
A user creates an access schedule from the Smart Locks Dashboard. Then, our software creates a PIN code specific to the lock and the desired schedule. When the PIN is entered into the lock, the lock verifies the code via its built-in algorithm to allow access.
What locks do we support?
Choose from a wide selection of Wi-Fi and Z-Wave smart locks from the following brands:
- August
- Yale
- Schlage
- Kwikset
- SmartThings
- TTLock
- Nuki
- Igloohome
- Salto
What does the Smart Locks Dashboard offer?
🔹 Generate unique door codes per reservation automatically.
🔹 View real-time lock status - online/offline, locked/unlocked.
🔹 Monitor your lock's battery life and door status - open/closed.
🔹 Enjoy seamless integration with multiple lock providers.
🔹 Sync Alerts: receive email notifications for unsynced locks needing your attention.
🔹Easy disconnect a lock.
Video introduction to automated guest entry with Uplisting Smart Locks
How to get started
- Navigate to Connect page in your Uplisting Account
- Select ' Uplisting Smart Locks' under 'Smart Home'
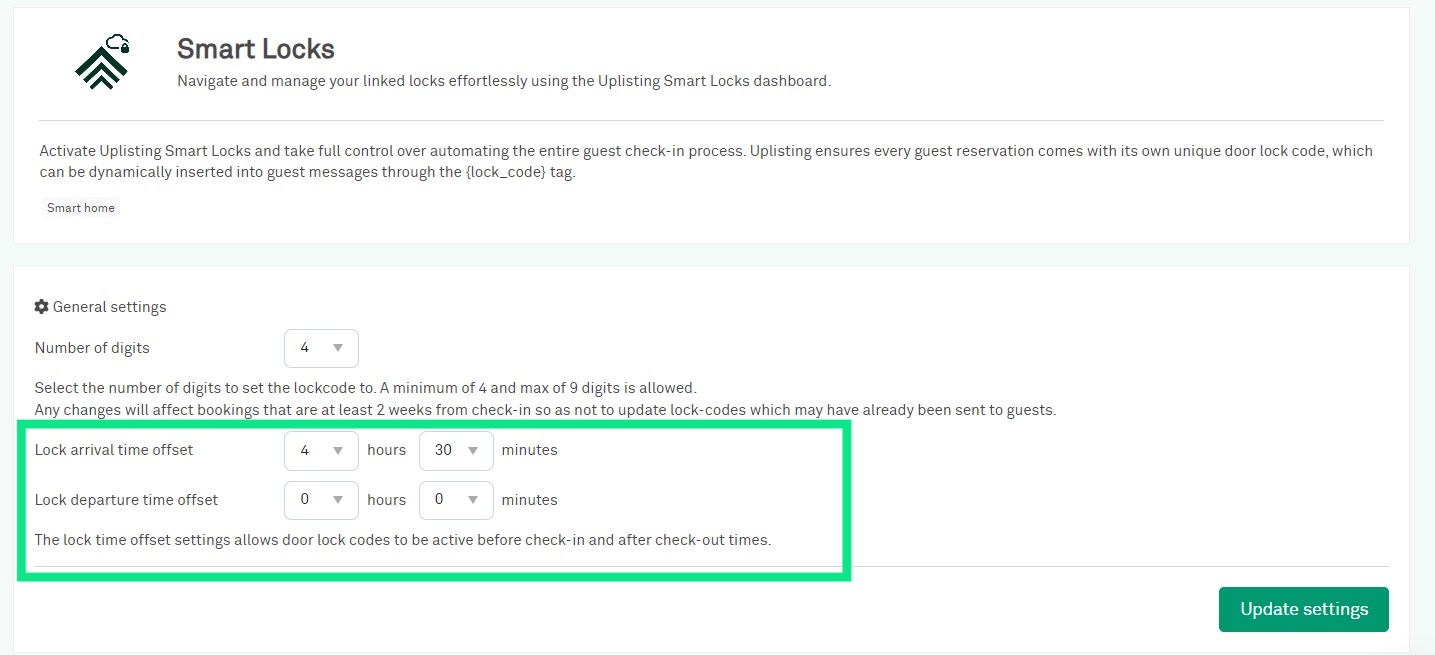
- Select the number of digits to set the lockcode. A minimum of 4 and max of 9 digits is allowed.
- Add a buffer time before check-in and after check-out during which the smart locks remain active.
- Click on 'Activate Smart Locks' and it will prompt you to allow access. Choose your lock provider and it will then create the connection.
- Once the connection is done, you will see the connect section in your dashboard.
- Click on 'Settings', and you will see all the names of your current locks, where you need to start connecting them to properties.
- Select your properties, and click 'apply'.
- Insert the {lock_code} message tag into your automated messages where appropriate.
- Done! Automated guest check-in with smart locks is now up and running.
Setting Your Lock Code
When configuring your smart lock, you have the option to choose the number of digits for the lock code. You can select a minimum of 4 digits and a maximum of 9 digits. This allows you to personalize the security level of your lock according to your preferences and needs.
Check-in and Check-out Buffer Time
The Smart Locks Buffer feature allows users to customize the time window before check-in and after check-out during which the smart locks remain active.
For example: if your check-in time is at 11:00 AM and you set the check-in buffer for 1 hour and 30 minutes, guests can access the property starting from 9:30 AM. This feature provides added flexibility for hosts, ensuring a seamless check-in and check-out experience for guests and allowing for scenarios such as late check-outs or temporary access for storing luggage.
Note:
- The customized buffer durations is applied to all remote locks
- Set the check-in and check-out buffer times separately
Multi-Unit Support
Uplisting Smart Locks allows you to connect one lock to multiple properties. With this feature, you're not limited to assigning a lock to an entire property. Instead, you have the flexibility to assign a lock to each individual unit within your main property. This is incredibly useful for hosts managing properties with multiple units, such as apartment buildings or multi-room houses. By allowing you to assign a lock to individual units within a property, you gain more control over your property access.
How it Works
- Click on 'Show configuration', and you will see all the names of your current locks, where you need to start connecting them to properties.
- Assign Locks: Choose which lock to assign to each unit within your property on Uplisting.
- Automate Check-ins: Once a guest reservation is made, Uplisting automatically creates a unique door lock code for the specific unit.
- Insert the {lock_code} message tag into your automated messages where appropriate.
- Sit Back and Relax: Your guests receive their unique door lock code, and their check-in is entirely automated.
Switching from RemoteLock to Uplisting Smart Locks
- First set up Uplisting Smart Locks in your connect dashboard, following the above instructions.
- Double check the connections.
- Remove the RemoteLock connection in your connect dashboard.
NoteBoth systems can run in parallel for a short period of time or using different locks. However, syncing issues on one system may arise if the same lock is used on both systems. For a seamless transition and to avoid sync failures, it's recommended to configure all your Smart Locks and remove RemoteLock directly after.
Smart Locks Pricing
Smart locks are available as an optional extra. Each smart lock incurs a monthly charge of £4 per each activated lock. You have the flexibility to deactivate a lock whenever you wish through the smart locks dashboard by choosing the 'remove connection' option. Please be aware that you will no longer incur charges for any locks that are disconnected moving forward.
Updated 7 months ago