Form Responses Overview: Submissions from Your Site
Manage, Export and Delete Responses
There are a few places responses can be accessed: the Site Dashboard, in the editor, and from the
form itself.
NOTE
Form submissions sent from the preview link or in-site preview will be delivered to
the designated recipient (or account owner if a recipient hasn't been designated).
However, they won’t appear in the site responses or be included in the CSV
export.
Site Dashboard (Manage, Delete, and Export)
To navigate to the form responses in the site dashboard:
- From your Dashboard side panel, click on Site Overview then select _Form Responses _ (located in the side bar of options, under Site Overview).
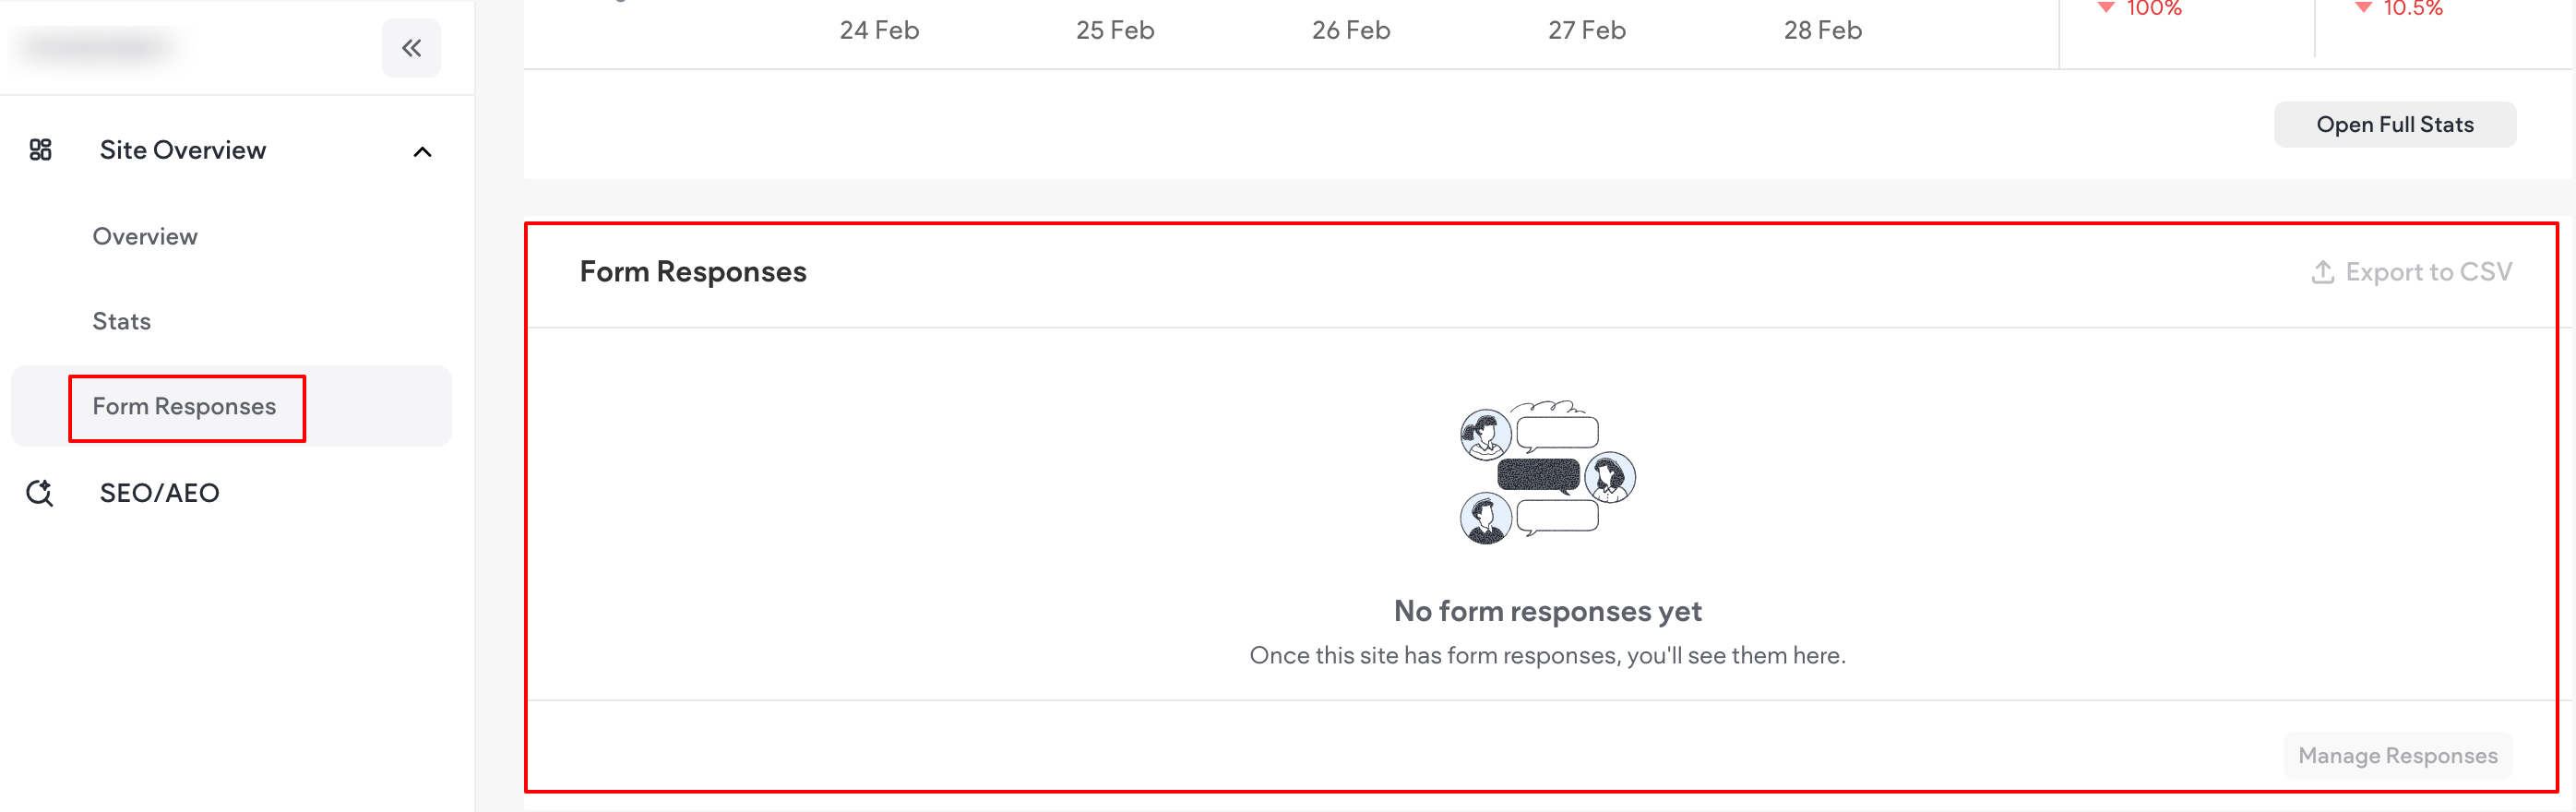
- To export the responses, click Export to CSV in the top-right corner of the Form Responses
section. - To manage responses, click Manage Responses.
- The Form Responses page opens and allows you to remove any response to any form on the site.
You can search for relevant responses in the Search responses search box. Ensure you search
for the exact name, phrase, or characters. - Click on the relevant form tab to open a table which includes:
- The date of the form response submission.
- The input from each of the form fields.
- The option to delete the form response.
- To export form responses in CSV format, click Export to CSV in the top, right corner of the Form
Responses section. Note that this button is only visible if the form has responses on the live site.
In the Editor (Manage and Delete)
To navigate to the form responses in the editor:
- In the side panel, click More, then click Settings.
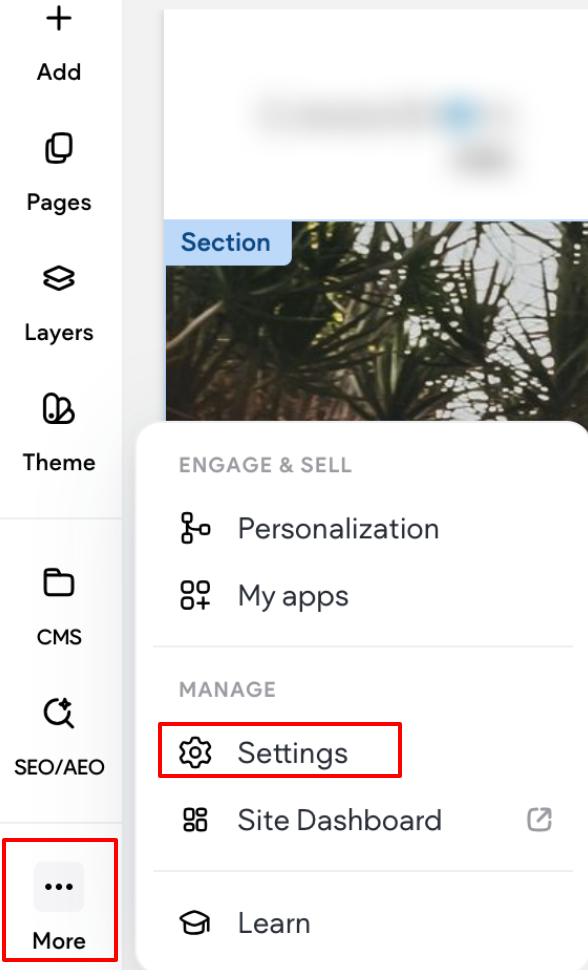
- Click Manage Form Responses.
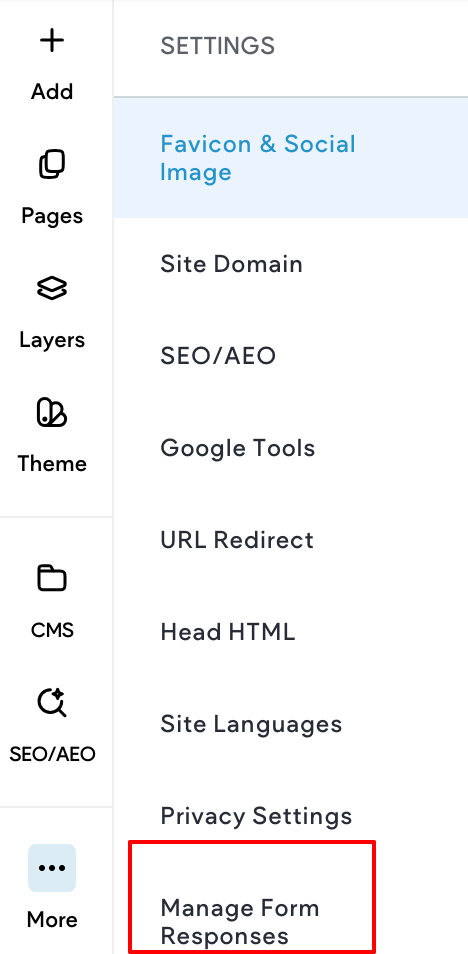
- The Form Responses screen opens and allows you to remove any response to any form on the
site. You can search for relevant responses in the Search responses search box. Ensure you
search for the exact name, phrase, or characters. - Click on the relevant form tab to open a table which includes:
- The date of the form response submission.
- The input from each of the form fields.
- The option to delete the form response.
From the Form Itself (Export Only)
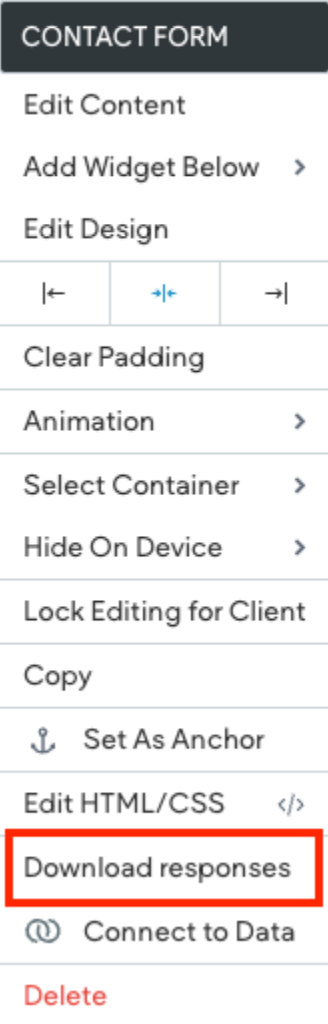
To export responses from the form:
-
In the editor for the site, navigate to the desired form.
-
Right click on the form.
-
In the contextual menu, select Download responses.
NOTE
If the option isn't available, this may indicate there have been no responses on the
live site.
Respond to Customer Contact Form Submissions
To respond to a customer’s contact form submission directly from your email, simply click Reply to
Customer in the email you receive from Website Builder. This will automatically populate the submitter’s email address in the "To" field, allowing you to reply directly. Please note, if the customer provided
multiple email addresses, only the first one will be used.
NOTE
When replying this way, the email might be marked as spam, depending on the submitter's email and settings. To help ensure the submitter receives your reply, consider
copying their email address and sending a new email instead.
Configure a GDPR-Friendly Contact Form
To obtain consent from your visitors upon contact form submission, add a new field to your contact form and select either Opt-In or Free Text as the Field Type.
Opt-in vs Free Text
The Opt-in field must be checked by the submitter before the form can be submitted. This field also includes default text, which reads, By checking, I agree to share my form responses.
In contrast, the Free Text field only displays the desired notification. As a multi-purpose field, it doesn’t include any default or suggested text.
To add an Opt-in or Free Text Field:
- Access the content tab of the form. The option to access the content editor is available in the floating menu. Click the element to open the floating menu, then click the option for the content editor.
- Click Add field.
- Click Into the Field type drop down and select either Opt-in or Free Text.
- Configure the field as desired.
FAQs and Troubleshooting
NOTE
If the Submission recipient is empty, the primary email in the content library will be used. If no such email exists, the account owner will be used as the default submission recipient. All responses go to the form responses page.
With the Google Sheets integration, I received a this app is blocked error
The issue was caused by a security change on Google's end that we had to comply with.
To fix it:
- Navigate to myaccount.google.com/connections.
- Search for Website Builder.
- Click Delete all connections you have with Website Builder.
- Go back to the editor, and try to connect again.
I'm not receiving form submissions
If you are not able to receive any form submissions that are being sent using the Contact Form widget, most likely it is because our mail is being filtered as spam on your email server.
If you do not receive emails from Website Builder, check your spam folder. If you still do not see the email, make sure to allowlist the IP addresses 167.89.22.215, 149.72.216.48, 149.72.184.31, 149.72.166.161 and 149.72.162.205 in your email provider's settings.
Additional troubleshooting tips:
- Check the form responses to ensure the contact form is working. You can click the contact form and click form responses to download it.
- Check to see if the email is valid. If you enter multiple emails, remember to use a comma between emails (no spaces) to separate them.
- Check your spam folder.
- Check your email filter and denylist settings to ensure that they are not being blocked.
- Add [email protected] to your email allowlist.
- Create a new page and insert your contact form there to see if it works.
- Turn off any custom scripts in your site in the site settings.
NOTE
If your contact form still does not work after running through the troubleshooting checklist, contact your email provider to look into why our contact form email submissions are not being received.
If it is working on another page on your mobile site but not the page it is meant to work on, that usually means there is a custom script interfering with your contact form working. Either reset the page or check the page and site head HTML for any custom scripts that might be causing this issue.
How do I set it up for a submitter to receive an automated email after submission?
There is a setting that is on by default that will send an automated email along with a copy of their submission.
To manage this setting:
- The option to access the content editor is available in the floating menu. Click the element to open the floating menu, then click the option for the content editor.
- Select the Submission tab.
- Click Actions after submission.
- Scroll down to Email Settings.
For more information on actions after submissions, see Actions after submission
Updated 3 months ago