Widgets: Contact Forms
Widgets: Contact Forms
Widget Categories: Business
Use the Contact Form widget to add a web form to your site. The Contact Form widget allows you
to provide visitors with a variety of input areas; specific text, drop-down, radio buttons, check boxes,
date, time, email, and phone numbers. You can use the form for email newsletter opt-ins, customer
questions, or simply to gather feedback from your site visitors.
📘
WARNING
We do not recommend duplicating contact forms, as this typically results in issues in
the duplicated contact form.
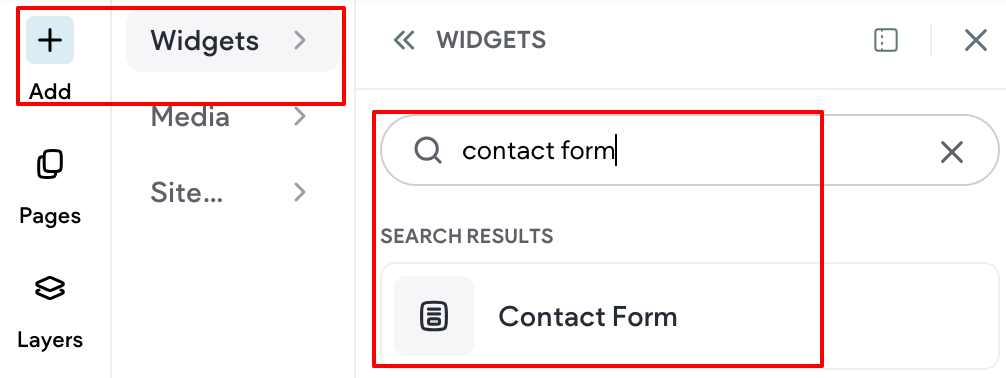
For information on adding widgets, see Add Widgets
📘
TIP
Fore more information on widgets and the widgets library, see Widgets: Library and Overview
Setting up and Configuring Forms
Content Editor: Configuring the Form
To access the content editor, right-click the widget and select Edit Content. Or, if you are in flex mode
or Editor 2.0, the option to access the content editor is available in the floating menu. Click the element
to open the floating menu, then click the option for the content editor.
Tabs in the Content Area
Form Items (On-Site Form Components)
Contact form Fields
Modify the existing fields by clicking the name of the field in the list.
To add new fields, click Add Field.
After clicking an existing field or adding a new field, additional settings will appear. Many settings will
depend on the Field type selected.
📘
NOTE
On radio buttons and check boxes, you can add images to display for the options.
The images will not appear in the email received from the form submissions, but the
selected label appears (even if hidden on the site).
Contact Field Settings and Considerations
- Most field types will have these options:
- Required field. If a required field is left blank, upon trying to submit the form, a red box will appear\
around it. While there isn't currently an indicator added (for example, an asterisk, one can be
manually added to the Field label or Placeholder.
- Start new line at this field.
- Field size. Customize the width of the field
- On radio buttons and check boxes, you can add images to display for the options. The images will\
not appear in the email received from the form submissions, but the selected label appears (even if
hidden on the site).
- Time field: the Use 24-hour clock toggle only affects the time displayed in submissions; the time\
picker format site visitors see will be dependent on their browser settings.
- File attachment field:
- The file name must not include a space when uploaded.
- The file size limit for attachments is 10MB.
- Only one file can be uploaded per file attachment field (if multiple files will need to be uploaded, a\
field will need to be included for each).
- The following file formats are supported: .pdf, .xls, .xlsx, .doc, .docx, .zip, .ppt, .pptx, .psd, .txt, .xml, .mp3, .ttf, .otf, .woff, .eot, .svg, .odt,\
.ott, .js, .css, .png, .jpg, .gif, .jpeg, .rar in addition to all video file formats.
- Submitted file attachments expire after 90 days.
- Files are not added to the Media Manager.
- Phone number field: The Phone number field will check for validation to ensure formatting conditions\
are met, if they are not, an error with a message will appear. The conditions are at least one number
and no invalid characters. In addition to numbers, valid characters are spaces, plus signs (+), dashes
(-), and periods (.).
Submit Button
Customize the text you want to appear on the Submit button.
reCAPTCHA
By default, reCAPTCHA validation is added to new forms. This protects your form from spammers and
speeds up the form submission process for site visitors.
Select a reCAPTCHA position.
Select to display the reCAPTCHA as an icon or text in the form.
📘
NOTE
reCAPTCHA cannot be disabled.
Form title
Type a Form title. To hide the form title, click the eye icon.
📘
NOTE
If you change the title of the form, the title only changes after a new response is
submitted. To change the form name quickly, we suggest you submit a test response
and wait a few minutes for the form to update.
Submissions (Options and settings for after a form is submitted)
New submission notification
To set the email address and subject for receiving form responses, click New Submission notification.
Make sure to enter the email address in the Form submissions will be sent to field in order to have a
copy of the information submitted.
If the Form submissions will be sent to is empty, the primary email in the content library will be used. If
no such email exists, the account owner will be used as the default submission recipient. All responses
go to the form responses page.
Actions after submission
Click Actions after submission to set up the following:
- Thank you and Error messages. Use the Rich Text Editor to add color, emphasis (bold, italics and\
underline), and bullets to add text in the boxes.
- Redirect settings. You can redirect to a page on your website or an external website.
- Email settings: an auto-reply, by default, will be sent to the form submitter along with a copy of their\
submission (as long as their provided email address is valid). When toggled on, there are additional
settings listed below.
- Auto-reply to form submitter. By default, an auto-reply will be sent to the form submitter (as long\
as their provided email address is valid). To turn this off, toggle the Auto-reply to form submitter
option off.
- Form name. You can also set the Form name (the name you enter here will show in the sent\
email’s “From” field). If the Auto-Reply setting has been toggled off, this setting will not be available.
- Email subject line. If the Auto-Reply setting has been toggled off, this setting will not be available.
- Email message. If the Auto-Reply setting has been toggled off, this setting will not be available.
- Include a copy of submitter’s form response in the email. This is on by default. Uncheck box to\
disable it. If the Auto-Reply setting has been toggled off, this setting will not be available.
Tracking
To add tracking code to your form, click Tracking, and paste conversion code or AdWords in the field
provided.
Integrations tab (third-party offerings)
On the Integration tab, send successful submission data to a third-party service. For more information,
see the section below, Contact Form Integrations (Additional Configuration Options)
Contact Form Integrations (Additional Configuration Options)
To extend the reach of your Contact Form, integrate it with various third-party solutions.
To add an integration, in the content area, click the Integrations tab.
📘
NOTE
We no longer offer Mailchimp or Constant Contact as contact form integrations. If you
previously had them installed, they will still be available for your site.
Google Sheets Integration
Use the Google Sheets integration to instantly add contact form submission data to a spreadsheet in
Google Sheets. All contact fields in the form will be populated into the spreadsheet, including a time
stamp of when the form was submitted.
- Click Google Sheets, and click Sign in with Google.
- Click Allow to grant permissions to connect to your Google account. If your computer is connected\
to multiple Google accounts, select the account you would like to connect to this form.
- Select if you want to add data to an existing spreadsheet or to a new one.
- Select the spreadsheet you would like to submit the form data to. You can select the spreadsheet\
from a list, or use the search bar to find a specific sheet.
📘 NOTE
- If you have multiple forms on the site you can connect each one to a different
spreadsheet, including spreadsheets in different Google accounts.- You can connect a couple of forms to the same spreadsheet. In this case, make sure
that the fields and order in the form are identical to fit the information submitted.- Submitting form data to a Google spreadsheet does not prevent you from downloading the data as a .csv file, or from receiving form submission emails.
Webhooks Integrations
Numerous online and cloud services offer integrations through a path called Webhooks. Webhooks
send notifications to a specific web address called the endpoint URL. You can connect the contact form
to send an event when the contact form is submitted.
To connect the contact form to another service using Webhooks, you need to create a custom endpoint
URL with your desired service and paste it into the Webhooks integration field in the contact form. Once
you add a Webhook URL, and the form is submitted, a POST request is sent to the endpoint with the
data in the body in JSON format. The following is an example of the JSON data:
The following is an example of the JSON data:

350
📘 NOTE
Submission Date and Form Title will always be provisioned. The other fields
( field_name : value) are based on the fields configured in the form.
All field information is set as a string and contained in quotation marks. For example, 7 is sent as "7".
Create an Endpoint URL
Endpoints are set up on third-party services (for example, Zapier or Slack), or another server that you
control. These endpoints are specifically set up to receive notifications from the Webhook.
Integration Ideas
• Slack. A robust messaging app that you can connect to receive notifications as soon as form data is
submitted.
•Custom Integration. Create your own custom Webhooks to integrate with the contact form. For
example, save submissions into a database or connect to custom apps or third-party services.
Example Webhooks/Endpoint URL Setup on Slack
- In the Slack app, open the main account drop-down, then click Apps & Integrations.
- The slack website opens. In the upper-right corner, click Build.
- Click Make a Custom Integration
- Select Incoming Webhooks.
- Select an existing channel, or create a new channel where your messages will post to.
- Copy your Webhooks URL.
- Adjust the settings and options to your liking, then click Save Settings.
- Open the Content Form editor and paste your Webhooks URL into Webhooks field.
- Click Done. Preview your site and submit the contact form to test the integration.
You will receive a message on Slack each time your contact form is submitted.
HubSpot (App)
The Hubspot connector is designed to seamlessly integrate your web design projects with Hubspot's
powerful CRM capabilities, our connector is the bridge between your website activities and customer
relationship management.
Note that Hubspot is an app and will need to be managed through the app store after installation.
MailChimp (App)
This connector is designed to integrate your web design projects with Mailchimp's powerful marketing
automation capabilities, forming a vital link between your website activities and email marketing strategies.
Note that MailChimp is an app and will need to be managed through the app store after installation.
📘 NOTE
We no longer offer Mailchimp or Constant Contact as contact form integrations. If you
previously had them installed, they will still be available for your site.
ActiveCampaign (an App)
The ActiveCampaign connector is crafted to integrate your web design projects with ActiveCampaign's
robust email marketing and automation capabilities, establishing a crucial link between your website
activities and sophisticated marketing strategies.
Note that ActiveCampaign is an app and will need to be managed through the app store after installation.
Automation Builder by Albato (an App)
The Automation Builder is your gateway to seamless integration between your Website Builder and a
myriad of marketing and CRM platforms. This powerful tool allows for bidirectional data flow, enabling
not just data transfer from your Website Builder to platforms like MailChimp and ActiveCampaign but
also vice versa. It's designed to enhance flexibility and efficiency, simplifying complex workflows across
various services.
Note that Automation Builder is an app and will need to be managed through the app store after
installation.
Design Editor: Designing the Form
To access the design editor, right-click the element, and click Edit Design. Or if you are in flex mode
or Editor 2.0, select Edit Design from the floating menu to open the design panel. Click the element* to
open the floating menu, then click the option to edit design.
Layout
On the Layout tab:
• Click the layout icon to select a layout design for the contact form.
• To change the form alignment, click Left or Right.
Item
On the Item tab:
• To make edits to the field style and field text, click Fields.
• To edit the button style and button text, click Button. To revert back to the theme style, click Revert
to theme button.
Frame
On the Frame tab:
• To make edits to the frame style, click Frame Style. You can change the background by adding a
color or image.
• To change the text style of the title, click Form Title.
• To change the text style of the submission notification, click Submission Message.
For information about design options that are not specific to this widget (for example, layout, style, or
spacing), see Widget Design
Add Connected Data (Dynamic Content)
You can connect the email address to the content library, or to an email field in collections. Additionally,
you can add collection fields such as apartment ID or team member name to the email subject or as
external fields sent in the form. Those additional fields will be available not just in the form email but
also when accessing the form responses data from site overview tab in the Site Dashboard.
📘 NOTE
Only possible on dynamic pages.
To add connected data to a contact form:
- Right-click the widget, and click Connect to Data.
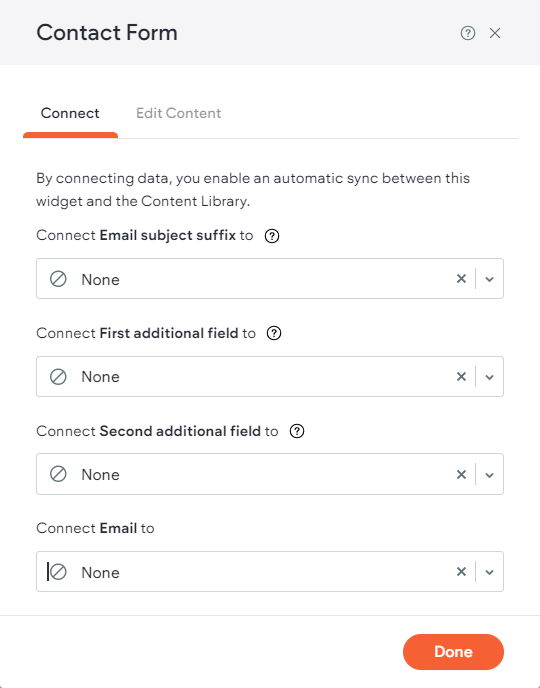
- Select the email address from the Connect Email to drop down.
- (Optional) Select additional fields you want to include in the contact form email.
- (Optional) Click Edit Content and make any necessary changes to the content. All changes will be
synced with your content library.
- Click Done
Updated on: 12/05/2026
Thank you!