Widgets: Business Hours, Click to Call & Email
Widgets: Business Hours, Click to Call & Email
Widgets: Business Hours
Widget Categories: Business
The business hours widget displays the days and times your business is open. This widget is particularly useful for making sure your customers can easily find out when to contact or visit your business, ensuring that you do not lose any potential customers due to a misunderstanding about when you are available.
For information on adding widgets, see Add Widgets
📘 TIP
For more information on widgets and the widgets library, Widgets: Library and Overview
Content Editor
The option to access the content editor is available in the floating menu. Click the element
to open the floating menu, then click the option for the content editor.
Business hours set up options
- Choose how to build your hours list.
- Online. This option will be deprecated.
- Build your own.
- Click on a day to bring up its setting options.
- Working hours. Set the hours for the day
- Open 24 hours.
- Closed.
- Appointment only.
- Click Set Special Days and Holidays to add exceptions to your business hours or to make\
customers aware of different hours on those days.
📘 NOTE
Special days and holidays will not show up on the widget until the scheduled
day is within 13 days. For instance if May 20th is set as a Special day or holiday,
it will not show on the site until May 6th.
- Start Week On. Set what calendar day your business week starts on.
- Use 24-hour clock. Toggle between a 12-hour AM/PM clock and a 24-hour clock.
- Combine days with identical opening hours. If multiple consecutive days in your workweek have\
identical business hours, this option combines them, so that they appear on the same line.
- Title. Select a title to display above your business hours (or hide it by clicking the eye icon).
Alternate Setup Option: Dynamic Business Content
Business hours can also be configured in the Business Info, located in Content area in the sidebar.
To connect the business hours widget to the Business Info:
- Right-click on the widget and select Connect to Data.
- Select the desired location.
Design Editor
To access the design editor, select Edit Design from the floating menu to open the design panel. Click the element to open the floating menu, then click the option to edit design.
- On the Item tab, edit the design of the items, such as font, size and color.
- On the Frame tab, change the background and border styles.
- On the Spacing tab, customize the inner and outer spacing.
For information about design options that are not specific to this widget (for example, layout, style, or spacing), see Widget Design
Widgets: Click To Call
Widget Categories: Business
A Click To Call widget initiates a phone call when pressed on mobile. Adding a Click To Call button to
the mobile version of your site makes it easy for visitors to call your business.
📘 NOTE
We recommend using the Click To Call button on the mobile version of your site,
only. For a click-to-call option on desktop, consider using a regular button with the
Click to Call link option. This approach may work, depending on the setup. For more
information on the button widget, see Widgets: Button.
The Click To Call widget asks the visitor's device to call the number set in the phone
number field. Some devices may not have a way to handle this (most desktop computers and tablets, for example), or may handle it in unusual ways.
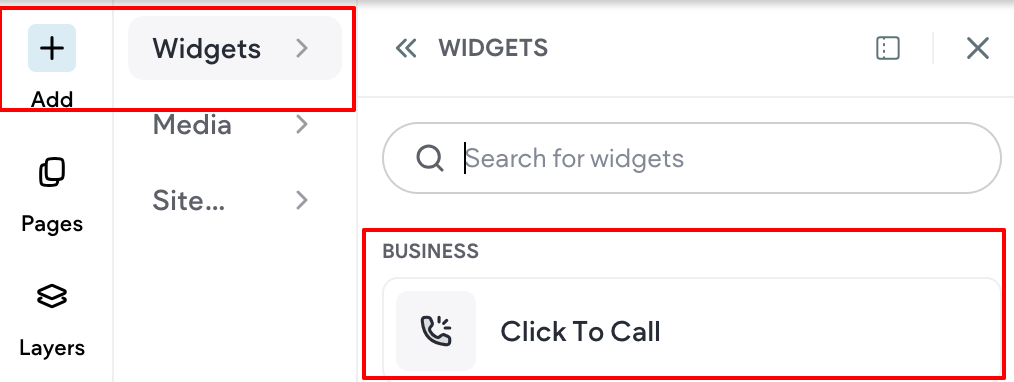
For information on adding widgets, see Add Widgets
📘
TIP
Fore more information on widgets and the widgets library, see Widgets: Library and Overview
Content Editor
The option to access the content editor is available in the floating menu. Click the element
to open the floating menu, then click the option for the content editor.
- Type a phone number in the field provided. Type a + symbol before the country code for international numbers.\
Unfortunately, there is no standardized way to automatically dial extensions.
- Type the text you want to display on the button.
Design Editor
To access the design editor, select Edit Design from the floating menu to open the design panel. Click the element to open the floating menu, then click the option to edit design.
For information about design options that are not specific to this widget (for example, layout, style, or
spacing), see Widget Design
To make the widget a floating widget, enable the Floating toggle, and select a position for the widget.
To display the floating button on the current page only, enable the Show on this page only toggle.
Widgets: Click to Email
Widget Categories: Business

When you add an Email widget to your site, you make it possible for visitors to be prompted to send an
email to your address. Adding this to your home page can help turn visitors into customers; adding it to
contact pages makes it easy for visitors to contact you as quickly as possible.
📘
NOTE
The Email widget asks the visitor's device to email the address set in the email
address field. Some devices may not have a way to handle this, or may handle it
in unusual ways. You may also want to display the email address so that users who
cannot send an email automatically through their device can send an email manually.
For information on adding widgets, see Add Widgets
📘
TIP
Fore more information on widgets and the widgets library, see Widgets: Library and Overview
Content Editor
The option to access the content editor is available in the floating menu. Click the element
to open the floating menu, then click the option for the content editor.
- Type an email address in the field provided. This email address added to the button is not hidden,\
and can be collected by anyone visiting the page. If you would prefer to hide your email address
from potential spammers, consider using a Contact Form instead.
- Type the text you want to display on the button.
Design Editor
To access the design editor, select Edit Design from the floating menu to open the design panel. Click the element to open the floating menu, then click the option to edit design.
For information about design options that are not specific to this widget (for example, layout, style, or
spacing), see Widget Design
To make the widget a floating widget, enable the Floating toggle, and select a position for the widget.
To display the floating button on the current page only, enable the Show on this page only toggle.
Updated on: 12/05/2026
Thank you!