Widget Position: Fixed and Pinned
Widget Position: Fixed and Pinned
Fixed widgets allow you to keep a widget visible at all times, even when a visitor scrolls down the page,
while pinned widgets stick to their parent element (column or inner column) for as long as the parent
element is in the viewport.
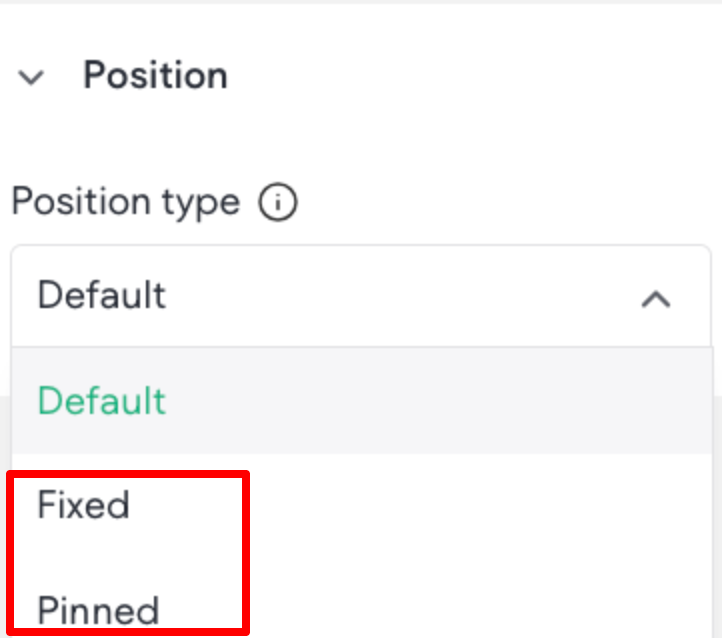
Widgets can be set as fixed or pinned in the Position section of the Design Panel.
Fixed Widgets
Fixed widgets allow you to keep a widget visible at all times, even when a visitor scrolls down the page.
Use fixed widgets to keep important calls to action fixed, visible, and clickable on all site pages. To make a widget fixed:
- In the side panel, click Add, then click Widgets.
- Search for the desired widget, then click and drag it onto the canvas.
- Click the widget to open the floating menu, and select Edit Design. This opens the design panel on
the right side of the screen. Scroll down to the Position section of the design panel.
- Click to expand the Position type menu and select Fixed. This change applies to all screen sizes,
however you can override it if necessary. Once you select the position, you cannot switch from
Fixed to Pinned. This is because when you select Fixed, the widget is removed from its original
container so that it can stay visible on the screen as the user scrolls. If you were to switch from Fixed to Pinned, the editor would not know what container to place the widget in. If you need to switch, you need to switch back to Default first. The widget will be moved to the first section in the viewport.
- In the Spacing menu, use the Margin settings to define where the widget is located in the viewport. This is especially important to configure if you have two fixed widgets in the same viewport
position.
- To display the widget on the current page only, enable the Show on this page only toggle
Pinned Widgets
Pinned widgets stick to their parent element (column or inner column) for as long as the parent element
is in the viewport. If there is more than one pinned widget in the same position, the widget on top will be
the first widget.
📘 NOTE
Pinned is not an option in advanced grids.
To pin a widget:
- In the side panel, click Add, then click Widgets.
- Search for the desired widget, then click and drag it onto the canvas.
- Click the widget to open the floating menu, and select Edit Design. This opens the design panel on
the right side of the screen.
- In the design panel, scroll down to the Position section.
- Click to expand the Position type menu and select Pinned. This ensures your widget sticks to
its parent element (column or inner column) as long as the parent element is in the viewport. This
change applies to all screen sizes, however you can override it if necessary.
- In the Position section, configure the widget’s offset. The offset is where the widget will be pinned
on scroll before leaving the viewport. If set from desktop, other screen sizes will have the same
values, however it can be overridden per screen size as necessary. If sticky header is enabled, the
offset will be based on the default header height. If you enable a sticky header after setting offset, it
will not automatically update and you will need to go back and manually adjust the offset.
If at any point you move the pinned widget to a different parent element (column or inner column), the
design panel settings, like offset, will be retained.
Updated on: 12/05/2026
Thank you!